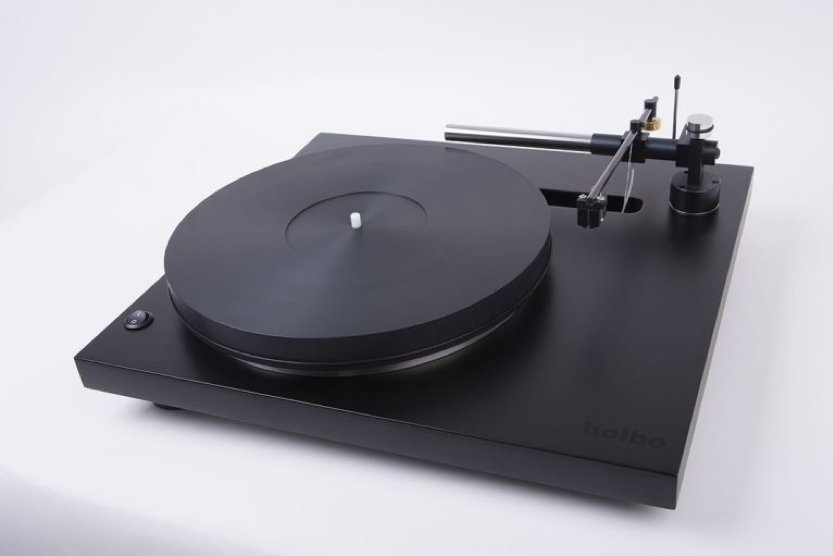
To my analytical mind, tangential tonearm tracking of a record has always made sense. The Holbo Airbearing Turntable System (pictured above) and imported to the US by Highend Electronics has a tangential tonearm.
Though not as common as pivot tonearms, the advantage of a tangential tonearm is a no brainer to me as you play the album back in the manner in which it was made. As you know, in the record cutting process the cutting stylus moves tangent to the groove throughout the entire side of the album. A well set up pivot arm is only tangent at two points on the record.
A tangential arm, on the other hand, mimics the cutting process and allows you to be tangent through the entire side of the album, just like it was cut. This gives you virtually zero tracking errors and results in better separation and a more solid soundstage.
Though rarely mentioned, a tangential tonearm also provides speed stability with an off-center album. A significant percentage of the albums in my collection have slightly off-center spindle holes. With a tangential air-bearing arm, the slight back and forth movement caused by an off-center hole does not cause a variation in speed. The arm simply moves with the groove and remains tangent. With a pivot arm, as the arm moves back and forth due to the off-center spindle hole, it is constantly changing the position of the stylus in the tracking arc and thereby inducing slight speed variations.
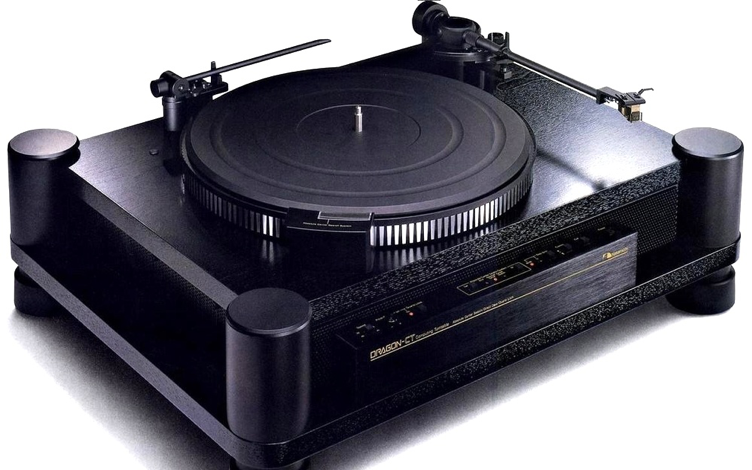
Nakamichi went to great lengths many years ago with their Dragon CT Computing turntable to employ a record centering system to reduce/eliminate the speed variations caused by off-center albums and pivot tonearms. This turntable (pictured below) was highly praised and a bit quirky, but to this day it is a highly sought after product on the used market.
A Little History
My tangential tonearm adventures started in the ’70s with the Rabco ST-8, and then I moved on to the B&O 4002 and 8002. Next up were the Yamaha PX-2, the Revox B-790, and the Technics SL-10 in the ’80s. My last attempt in the late 2000s was the Eminent Technology ET-2 arm on VPI and SOTA turntables.
The first six of these tonearms suffered from the engineering of the time that required the arm to literally be in the wrong position in order to know that it had to move forward. Various servo systems and sensors tried to know the position of the arm, and once it was in the wrong position it moved the arm into the correct position. So there was a constant “walking” of the tonearm across the record. This made no sense to me as it negated the theoretical advantage of a tonearm with zero tracking error. But, try them I did. Hey, what can I say? I am a glutton for punishment.
The Eminent Technology air-bearing arm did not require this “wrong to be right” system. It sat on a virtually frictionless cushion of air, and it was moved along by the album itself. The Eminent Technology arm was the precursor to the modern air-bearing arms we see today. It was the best effort I had heard in my search for a tangential solution, and it still has a cult following.
Fast forward to 2019-20 and we see some better-engineered attempts at this solution. The availability of better manufacturing capabilities, CNC machines, and tighter tolerances brought us some new contenders. The Clearaudio TT2 arm and the Walker arm along with the Bergman Turntable come to mind and all look to be well-engineered solutions. Alas, they are quite far from my financial reach.
Enter the Holbo Airbearing Turntable System
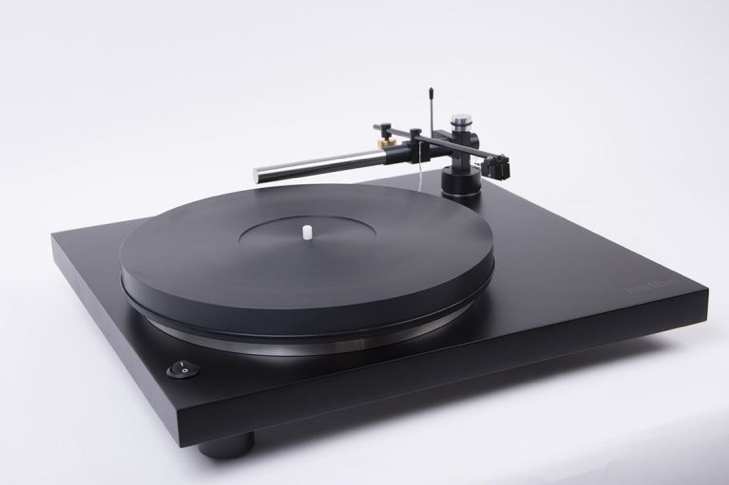
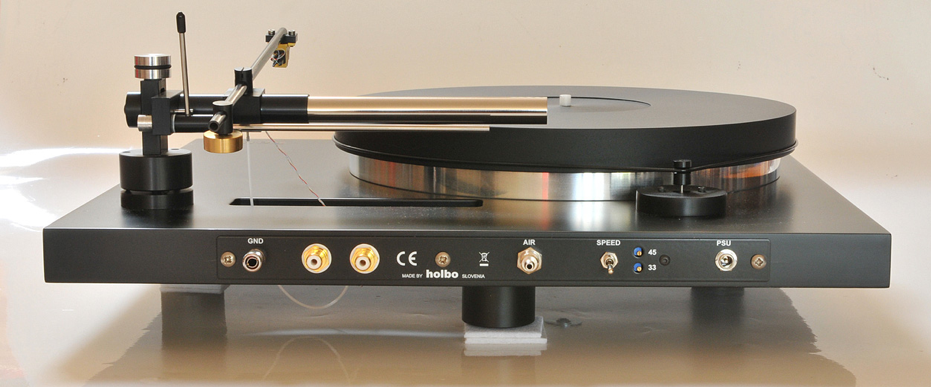
This turntable system is made in Slovenia by Bostjan Holc. It consists of an air-bearing platter and an integral air-bearing tangential tonearm. A DC motor drives the 11 lb. anodized belt-driven platter. There is a substantial outboard DC motor power supply that you can locate remotely. There is no noisy switching wall-wart power supply in this system. On the top left of the plinth, you will find a discrete on/off power button. There is also a speed selection switch on the rear of the table for 33.3 rpm or 45 rpm.
The separate outboard air pump is quiet and can barely be heard. You cannot hear it from a normal listening position. The off/on switch is located on the rear of the pump. I would have liked a small discrete power indicator on the front of the pump. You don’t want to leave the pump running all of the time, and I found myself forgetting to turn the pump off at the end of a listening session and it ran overnight a number of times. A power light would have reminded me to turn it off.
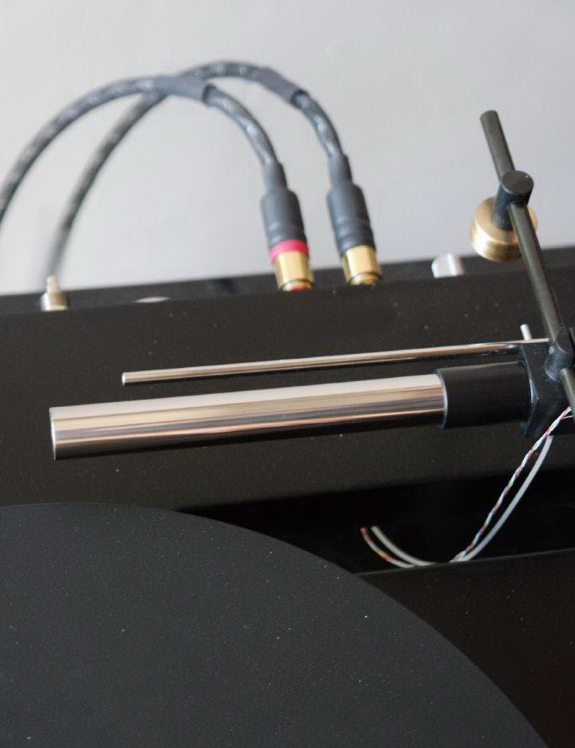
I understand that the outboard power supply and the air pump are upgrades from the earlier version of this turntable. The arm wand is carbon fiber with silver-clad copper Litz wiring that terminates in a pair of RCA connectors on the rear of the turntable. The arm has adjustments for all of the parameters you typically need including VTF, VTA, and cartridge azimuth.
By the way, the VTA adjustment is a very nice system. You simply loosen the lock screw on the side of the arm pillar and then you can turn the silver knob on the top of the arm pillar and adjust the arm up or down very precisely. You then lock it in place. You can even do this while the record is playing like many of the VPI JMW arms. Some graduated marks on the arm pillar would be a nice touch to reference the VTA position.
The arm cueing is not damped which I actually prefer. I like to control the rate of descent, and I find a non-damped arm is easier to hit the groove between songs. But you may feel differently. The three adjustable feet have very sharp points on them so be careful not to mar the support you place it on. Some kind of disc for these feet “spikes” to sit in would be a nice accessory to include in the package.
Don’t Let Looks Deceive You

Don’t let this table’s modest and understated appearance deceive you. ALL of the parts are very nicely machined and it is obvious there is a very high level of fit and finish with tight tolerances throughout this unit. This is a quality component. There is no “erector set” appearance here.
I truly appreciate the engineering that solves problems in the simplest way and with high precision. Throughout the time I had the table, it performed flawlessly and was a pleasure to use.
Having set up hundreds of tables over my time in the audio industry, I had no problem setting up this turntable. However, a newcomer would be challenged a bit by this one. The included manual is rudimentary at best, but I am told a new, more informative manual is in process for future tables that are shipped.
In the meantime, any questions you have would be promptly answered by the importer, Alfred Kainz at Highend-Electronics Inc., who has always offered outstanding customer support.
For this review, I chose to use the DS Audio E1 optical cartridge and I have to say the cartridge and the table loved each other.
Basic Setup
The basic setup is quite easy. You attach the airline from the pump to the back of the table and plug in the DC power cord that comes from the power supply. Then, hook up your chosen interconnects and you are ready to mount the cartridge.
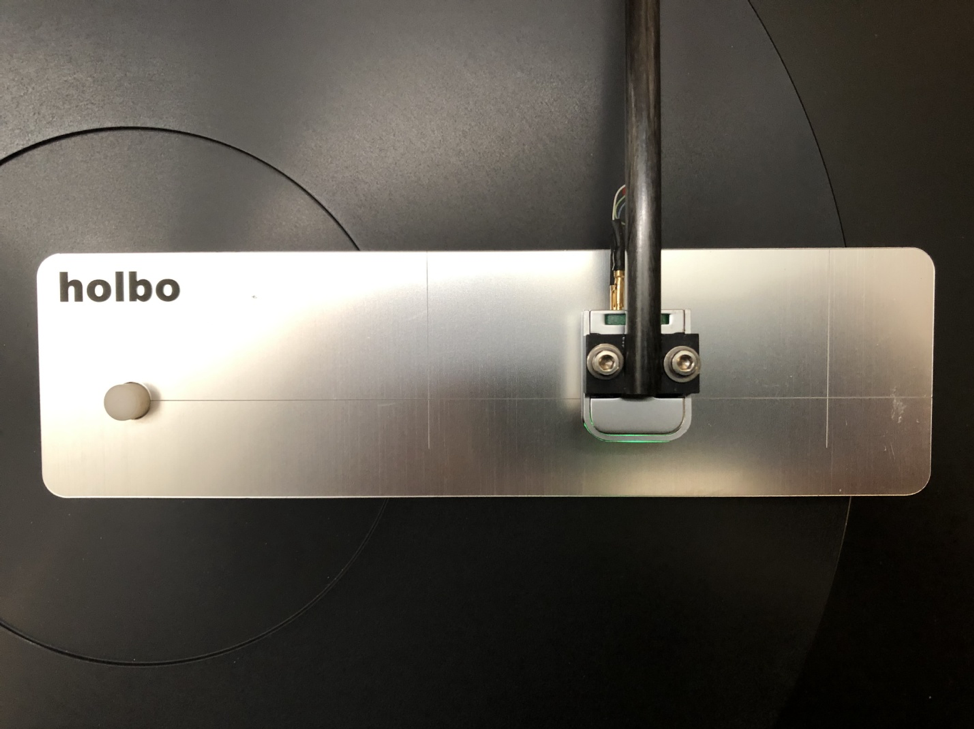
The package includes a cartridge alignment gauge that you use to set the cartridge position. Once you mount the cartridge you place the gauge on the platter and loosen the arm wand to allow it to change the position of the stylus. You use the gauge to find the stylus position that corresponds to the two points outside of the gauge where the vertical lines cross. There is only one position where the cartridge will hit both marks. This assures that you have tangency through the entire album.
Leveling the Table and Tonearm
Do not set your final tracking force just yet. The next step is very important. You have to level the table and the tonearm.
I used a Grizzly H2682 master machinist level to level the platter and would highly recommend you get one if you don’t have one. You can find a nice machinist level online for $70 to $90. Of course, being level is important on any turntable but on a turntable that has an air-bearing platter and air-bearing arm, leveling is ESSENTIAL.
The first step in this process is to level the platter by using the adjustable feet. Put the level on the platter and NOT on the plinth. Once the platter is perfectly level, you move on to level the arm. Due to its air-bearing design, this is quite important. You do not want the arm to move in one direction or another on its own because it is not level. It is important for it to maintain a zero bias force in the groove.
The procedure for doing this is easy and it also demonstrates the lack of friction in this air-bearing arm. With the air pump turned on, set the tracking force on the arm to .1g so that it is virtually floating. Now cue the arm down onto the silver overhang gauge that is still on the platter. The arm will probably move in one direction or the other. At this point, you use the supplied Allen wrench to adjust the arm-leveling screw in the tonearm base. There are pictures of this procedure in the manual.
Be very careful during this procedure as the arm is virtually frictionless and can literally slide off the end of the arm bearing. I do wish they had added an “arm travel stop” to prevent this from happening accidentally. I solved the issue with a snugly fit o-ring at the end of the arm bearing.
Setting the Tracking Force and Azimuth
Once the arm is level, you are then ready to set the tracking force and azimuth being careful not to change the overhang. This can be a bit of a “round-robin” as you work back and forth between VTF, azimuth, and overhang but be patient and invest the time to get this just right. It will pay off in the end. One thing I would like to see is some reference marks on the top of the arm tube for the cartridge position and for the counterweight position. They could look much like the marks on a ruler so that as you work through the adjustment procedure you have some reference marks to work from.
Lastly, you need to check the platter speed with a strobe (not included) and adjust it if necessary with the inset speed control screws on the rear of the unit for 33.3rpm and 45 rpm. This will require a very small screwdriver. While I appreciate the ability to adjust the speed, I do wish you did not need a tool to do it. I see this issue on a lot of turntables, and not just this one. It would be very easy to make the speed control adjustable by hand by having a small knurled knob accessible for each speed.
I will say that I never sensed anything but rock-solid speed control. That is a combination of the air bearing platter, the precision DC motor, and the Tangential arm. And, one other factor I would like to point out is a precision CAST belt. I still marvel at the high-end belt-driven turntables I see that do not use cast belts.
One final note, I did try using a Stillpoints LPI record weight, and I found it to be a subtle but very nice improvement over no record weight at all. It added a bit more focus and solidity to the sound.
Stay Tuned for Part 2
Ok, so now that the turntable is set up and ready to go, it’s time to play some music. You’re probably wanting to know how this turntable performs and sounds. Does the theory of a tangential arm work in the real world? Answers to these questions are in Part 2. Hint, you’re going to want to read it!
Price: $7,900 USD
Specifications:
Turntable:
– Airbearing design
– Linear Power Supply (NEW)
– DC motor
– beltdriven
– Aluminium platter 5 kg (11 lbs)
– Airbearing 2.16 kg (4.8 lbs)
Dimensions (WxDxH): 430mm x 400mm x 150mm (17 x 15.7 x 5.9 inches)
Total weight: 12 kg (27 lbs)
Tonearm:
Linear tracking airbearing tonearm
– aluminium alloy/carbon
– effective length 163 mm
– effective vertical mass 7.5 g
– total tonearm mass 31.6 g
Adjustments:
– azimut
– leveling
– vta +/- 7 mm
Wire: high quality silver/copper litz
Power supply: 110V-240V / 50hz-60hz 2 W
Airpump:
– Power consumption : 10 W
– Noiseless
– Dimensions: 225mm x 147mm x 120mm (8.9 x 5.8 x 4.8)
– Weight: 1.8 kg (4 lbs)
Tonearm:
Linear tracking air-bearing tonearm
– aluminum alloy/carbon
– effective length 163 mm
– effective vertical mass 7.5 g
– total tonearm mass 31.6 g
Adjustments:
– azimut
– leveling
– vta +/- 7 mm
Wire: high-quality silver/copper litz
Power supply: 110V-240V / 50hz-60hz 2 W
Airpump:
– Power consumption: 10 W
– Noiseless
– Dimensions: 225mm x 147mm x 120mm (8.9 x 5.8 x 4.8)
– Weight: 1.8 kg (4 lbs)

Hi,it is an excelent review! I learned some good things!
I have my first air turntable but I have a little problem.When I try to setup the tracking force with the air on in the tonearm the scale gauge is always oscilating, never show the same pressure.If I stop the air it’s ok but I understand It is not the correct way.
I setup the tracking force by ear but of course it is not the precise tracking force.
How do you suggest to measure the tracking force to 1.5g.I have an ortofon 2m black.
Kind regards, Romeo
Romero… Thanks for the kind words. I would double check and make sure you have the leveling of the arm EXACT by following the instructions in the manual.
I would also double check the front-to-back leveling. It is also a good idea to invest in a very good level if you have an air bearing table/arm. or for any turntable for that matter.
One other issue I have run up against… Make sure the scale you are using is non-magnetic..If not, the cartridge will be attracted to the scale and you will get strange measurements. This is more common than you think. Use a magnet and put it next to where to drop the stylus on the tracking force gauge and see if it is attracted to the magnet.
-ken